In my last post I claimed that learning to determine and drive a momentum-maintenance line was one of three basic skills that the beginning autocrosser must acquire in order to Save Time. In this post I’ll give another example, from the same event discussed in the last post, of how I approached a particular section, determined what line I wanted to drive and how I actually drove it as recorded by GPS data.
The course designer was Charles Krampert. Charles posted the course map prior to the event and challenged folks to state how they were going to drive the 180 degree turnaround section. This generated lots of interesting pre-event discussion on the TAC/TVR website (you can see it at http://teamtac.org/e107/e107_plugins/forum/forum_viewtopic.php?104840) with various ideas of how it should be done.
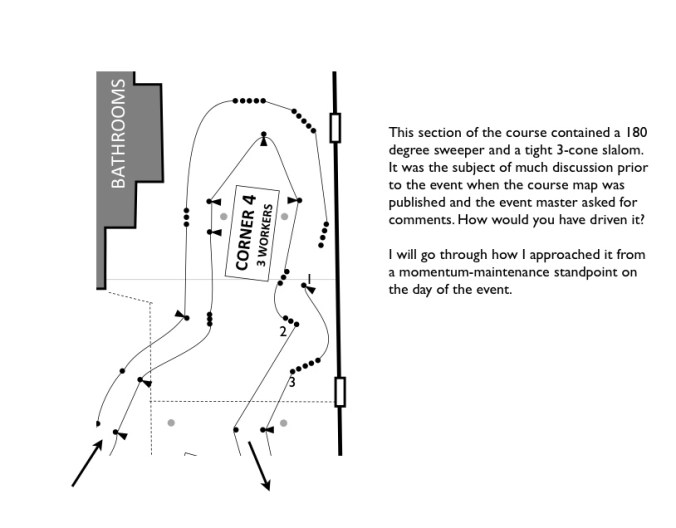
Figure 1
Figure 2
Figure 3
Figure 4
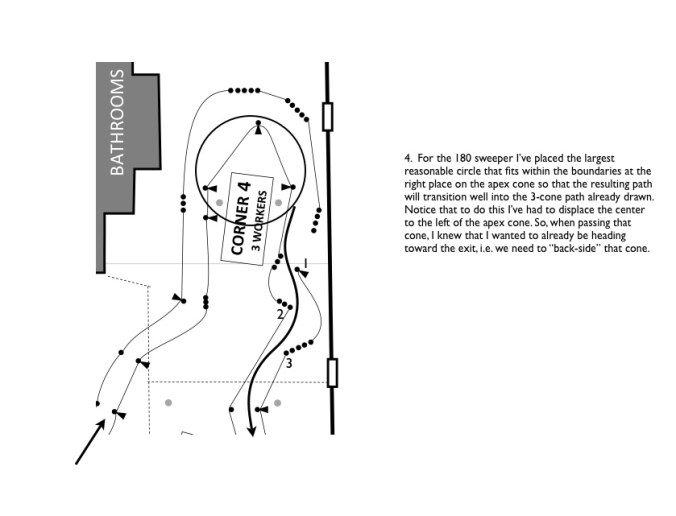
Figure 5
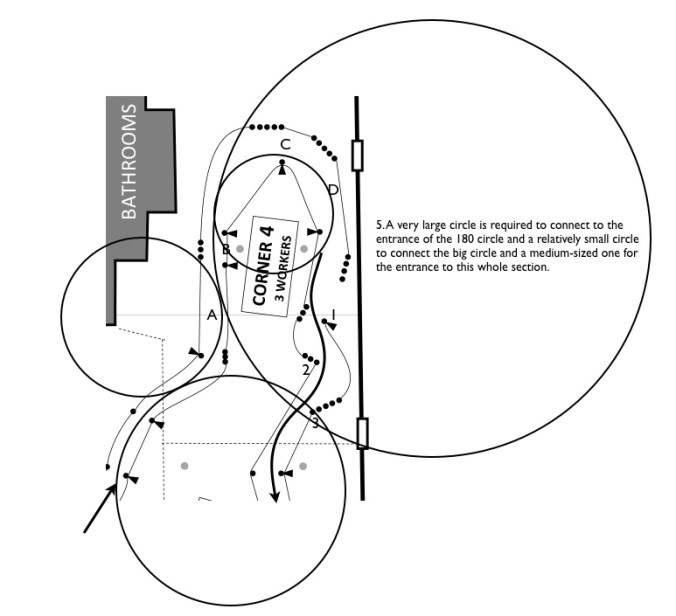
Figure 6
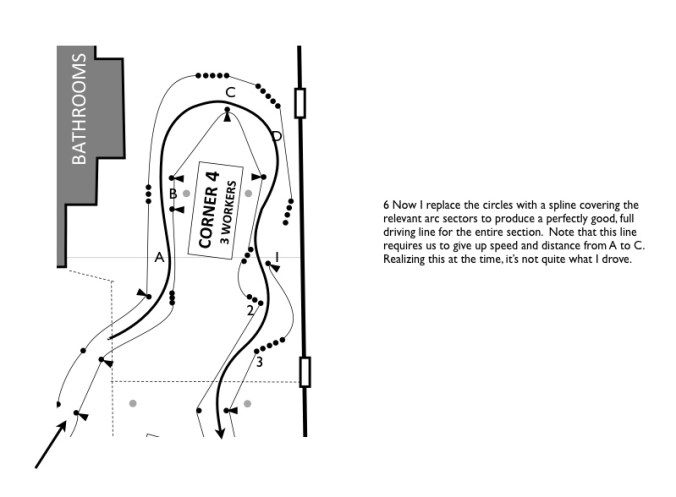
Figure 7
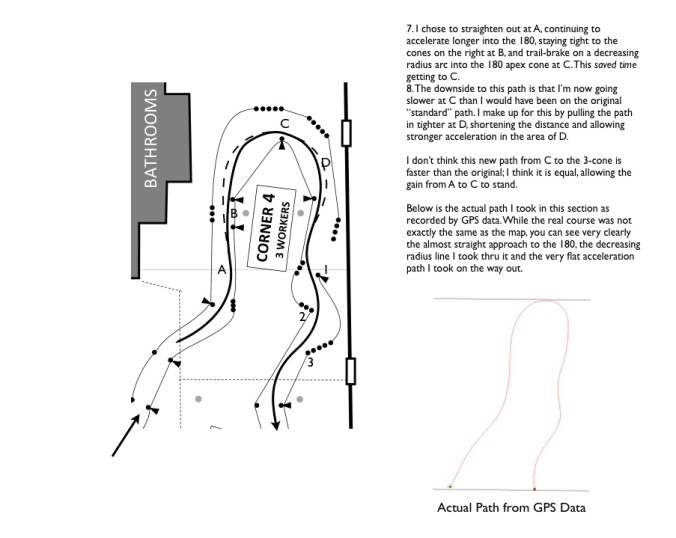
Figure 8

I like the use of the circles to connect elements to get a ideal smooth line. And you make a good point about how other lines can be faster depending on conditions.
LikeLike
I’m not surprised that you drove a different line on the day, because this example really highlights the pitfalls of a simple geometrical analysis.
This section of the course has a lot going on:
1. You have a kink prior to “A” that probably has an exit speed slower than the ideal entry speed to the B-C-D corner;
2. You have what a 3, arguably 4 cone slalom on the exit of the B-C-D corner; and
3. There’s a lot of distance to cover between D and the slalom entry.
So what?
1. You are going to have to accelerate through the A-B section, with braking and turning between B-C to set up the right line at C;
2. Slaloms need a constant speed throughout, so you either enter at the slalom’s natural speed or you stuff it past the initial cone but slow down to the natural speed before you cut back in the other direction;
3. The natural on-power exit line from C puts you too far on the wrong side of 1. It generates speed at the cost of distance, but it is speed you can’t use in the follow-on section so that’s a poor trade.
So what this tells me is that apex speed at C isn’t particularly helpful. More important, I suspect, is seeing the D exit cone as the *first cone in the slalom*. The aim of the exercise now becomes trying to put the right front tire right next to the D exit pointer cone, at full power, with the left front tire aimed at the right side of cone 1.This chops even more distance off the C-D section and the D-2 section and gains a heartbeat of nearly straight running to get prepared for the high-speed excitement that will happen in the 2-3 section.
I caveat this with the observation that course maps do not necessarily echo ground truth. My very straight shot between D-1 may not be practical if 2 is kicked over too far to get by. That might necessitate the move to the right of 1 to set up entry, as you did.
I note also that that’s a very “Street Mod” line. If I was driving a Stock Neon, I’m going to carry more apex speed at C because I can’t make speed back up on the D-1 stretch – and there’s a lot of it! And the car is narrow enough and tail-waggy enough that I can probably jam it in between 1-2 and make it out the other side.
Bottom line here being that the A-B-C line and the C-D-1 lines will be to varying degree straighter than what the geometric analysis predicted (as you drove!) and I suspect that the 1-2-3 line might have been capable of being driven straighter yet (with a big ol’ asterix)
I started out doing detailed geometric analysis based on course maps but quickly abandoned it as it simply didn’t work.
LikeLike